Pre-requirements:
Let’s get started!
Once you’ve installed PFSense on your VM, you obviously have to set it up. The nice thing about the PFSense image, is that it should automatically figure out your NICs, and determine your WAN & LAN ports. Keep in mind, you have to enable 2 NICs on your VM setup; one for WAN & one for LAN. **This also means that your virtual machine host must also have 2 NICs, one where the internet comes in to your network (WAN), and one where your internet would then head to a router or wireless access point (LAN).** The below screen shot is the very first boot screen after freshly installing PFSense:

I also have another VM machine set up that’s running LUbuntu, simply for testing and setup purposes, on this internal network. The first step is to enable the DHCP server functionality on PFSense so that your other machines will be given IP addresses. To start that, select option 2 to assign IP addresses to the interfaces.
Your WAN port should automatically be getting it’s IP address via DHCP, as shown on the screen shot above. In this case, it is getting 10.0.2.15/24 as the given IP address. Because of that, we do not need to change anything regarding that interface. However, we want to enable the DHCP server functionality on the LAN port. To do so, we’re going to selection option 2 from the above screen, and again option 2 to select the “LAN” interface:
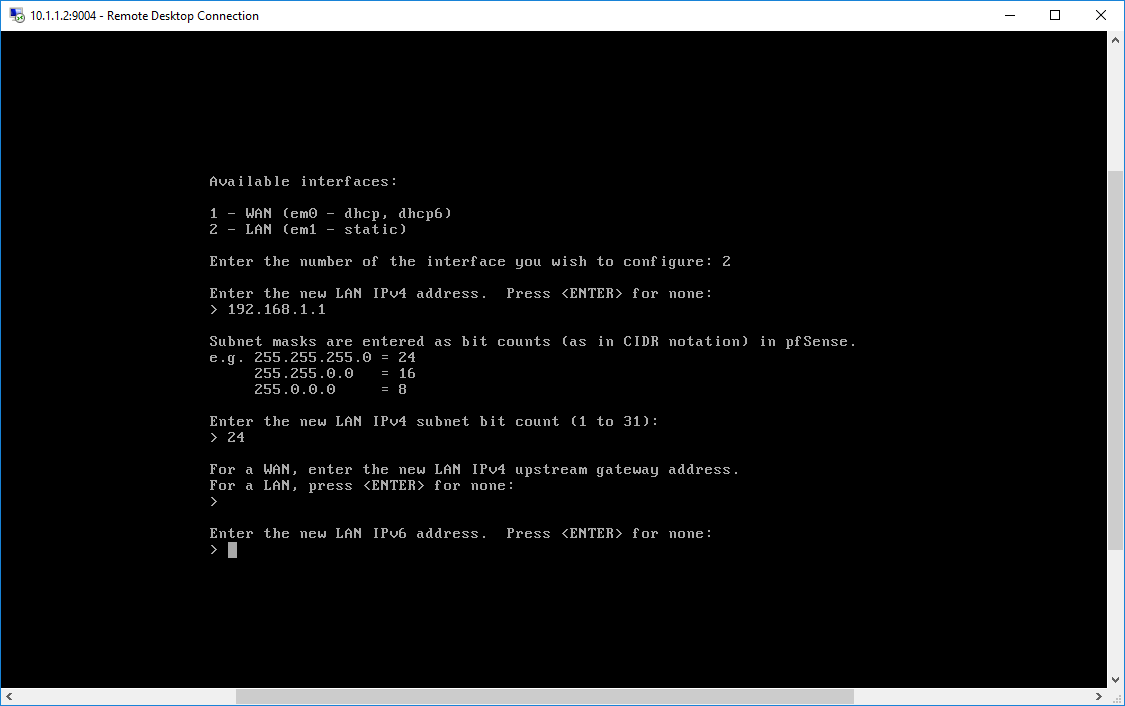
As the above screenshot shows, after choosing option 2 to select changing the LAN interface, I followed it with entering the local IP address I desired my network to have (192.168.1.1), and then told it I wanted the 255.255.255.0 subnet mask by entering in “24.” While continuing to follow the on-screen prompts, you hit enter twice to skip the next two prompts. This should lead you to the following question:

As shown in the above screenshot, you will get asked “Do you want to enable the DHCP server on LAN? (y/n).” and the answer is YES! If you don’t able this, the computers on your network won’t get IP addresses, and won’t have access to the internet. Input “y” followed by your desired start address range and end address range. I chose mine to be 192.168.1.2-192.168.1.254. After entering in that range, answer “n” to reverting back to HTTP protocol for the webconfigurator and your DHCP server is up and running. To test this, I started my LUbuntu VM to make sure I got a valid IP address and internet access.
The above screenshot also shows you how to access PFSense’s webGUI which is what we’re about to do next. On my LUbuntu VM, I opened up my web browser and entered in the address shown above: https://192.168.1.1 to get to the login screen of the webGUI. Because PFSense HTTPS protocol uses self signed certificates, you may need to click a “proceed to destination” button or “add an exception” to your browser to proceed. This is fine, because you know that the source is your own machine, and it is safe to proceed.
You’ll next be prompted to log into the PFSense webGUI. By default your username and password are as follows:
username: admin
password: pfsense
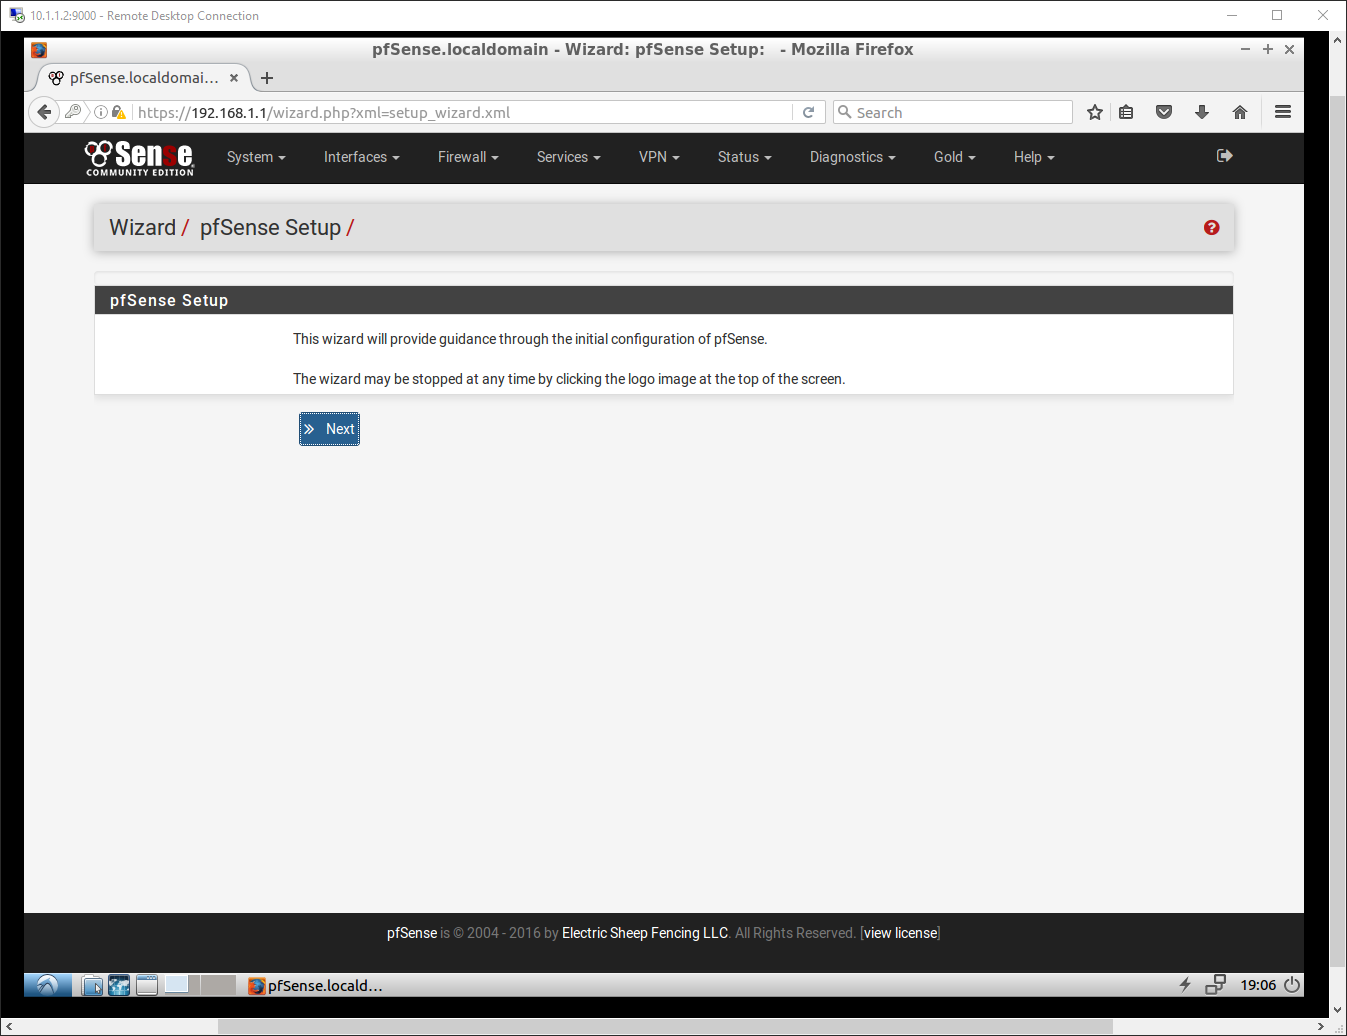
Upon logging in, it’ll send you to an automatic setup wizard as shown below. If you accidentally click out of the wizard, you can always re-access it under the “system” tab.
Clicking next to proceed will bring you to a page in regards to paying for PFSense gold edition. Feel free to read all about the gold edition, or simply click “next” again to proceed.
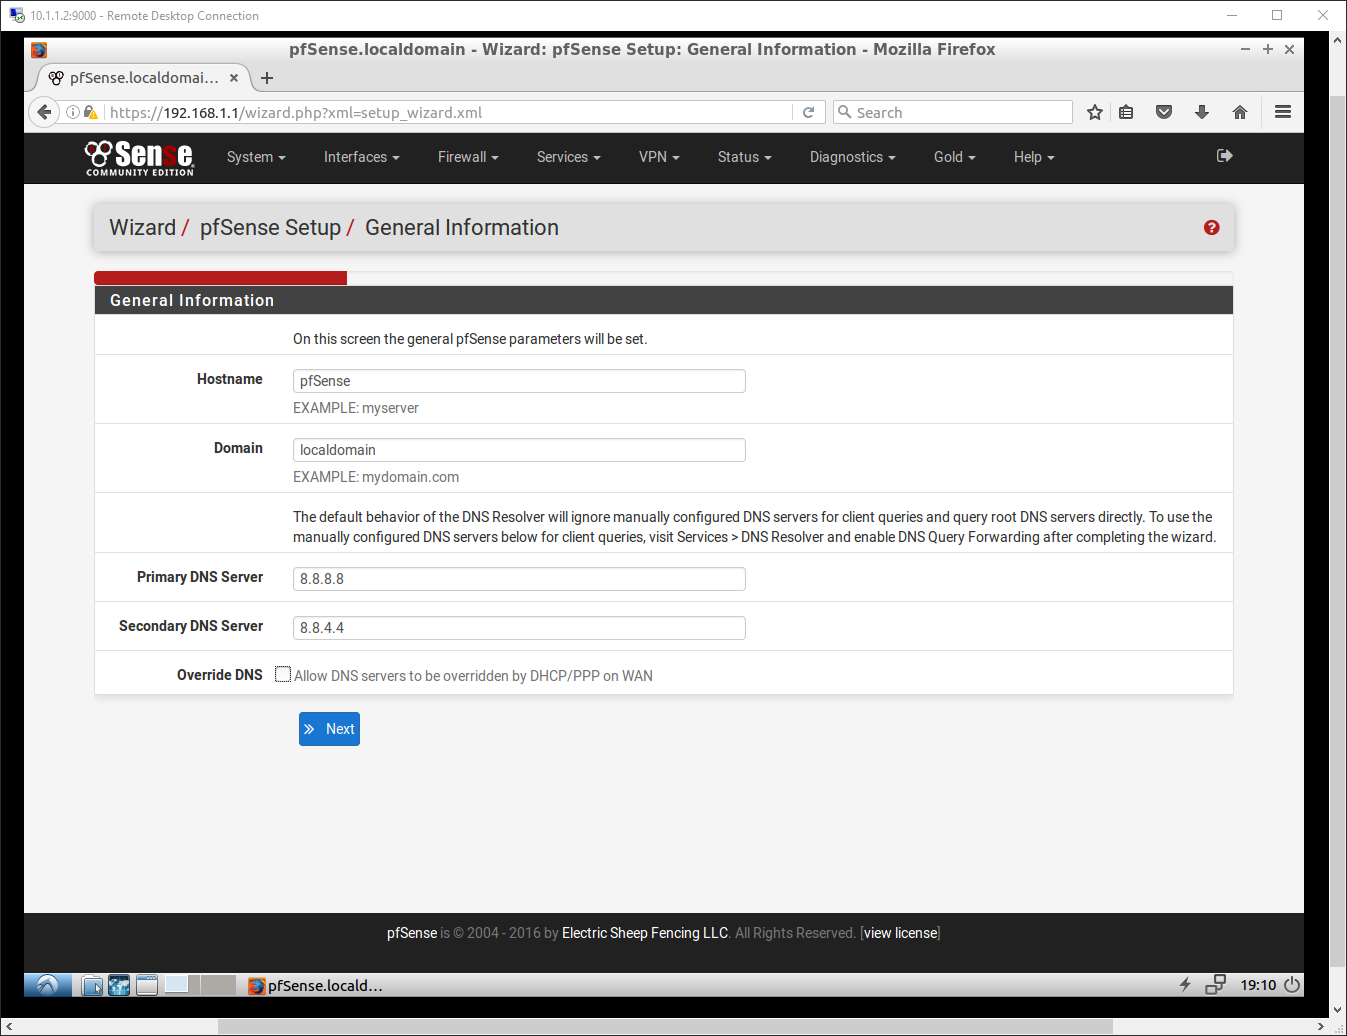
The very next screen is where you can begin customizing your PFSense. I took this opportunity to change the primary DNS server to google’s so that I don’t rely on my ISP’s slow DNS servers. If you do choose to enter a new DNS server list, make sure you uncheck the box that allows them to be overrode based on your ISP’s DHCP settings.
The next screen allows you to specify a new time server. I chose not to change this screen and simply proceeded to the next screen.
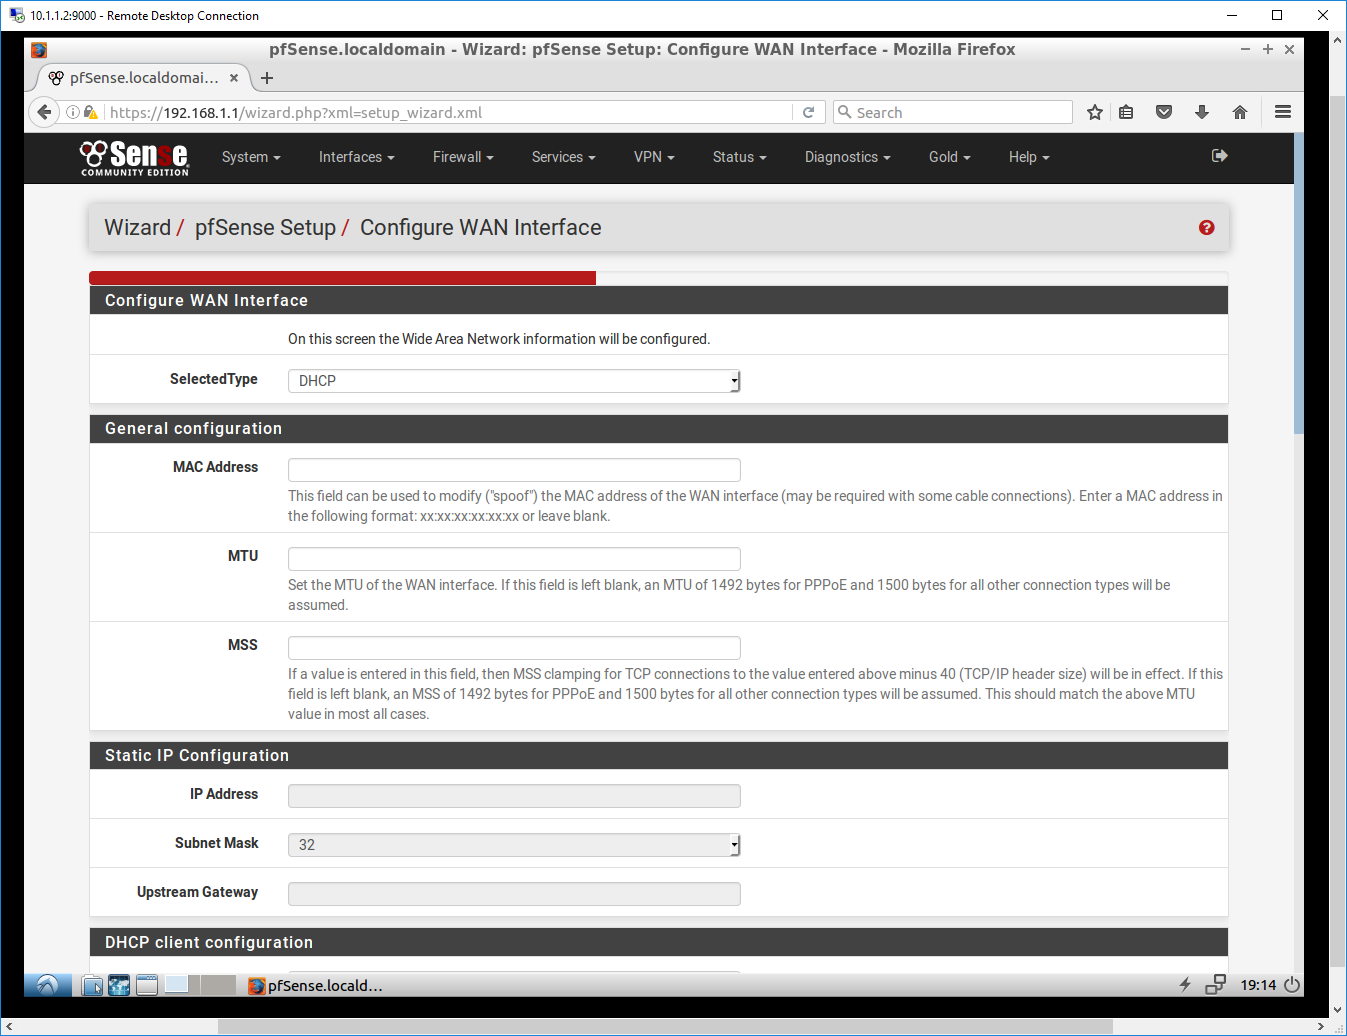
This is where you can change more details regarding your WAN interface. If your ISP requires PPPOE or PPTP configuration, this is where you can enter those credentials to gain access to the internet (screenshot below). I didn’t need to change any of these details, so I again proceeded to the next screen.
The screen following the WAN interface setup, is… You guessed it, the LAN setup page. We have already configured the settings shown on this page, so I did not need to amend these at all. After clicking “next” once again, You’ll land on the Admin password page, to customize your PFSense WebGUI login password.
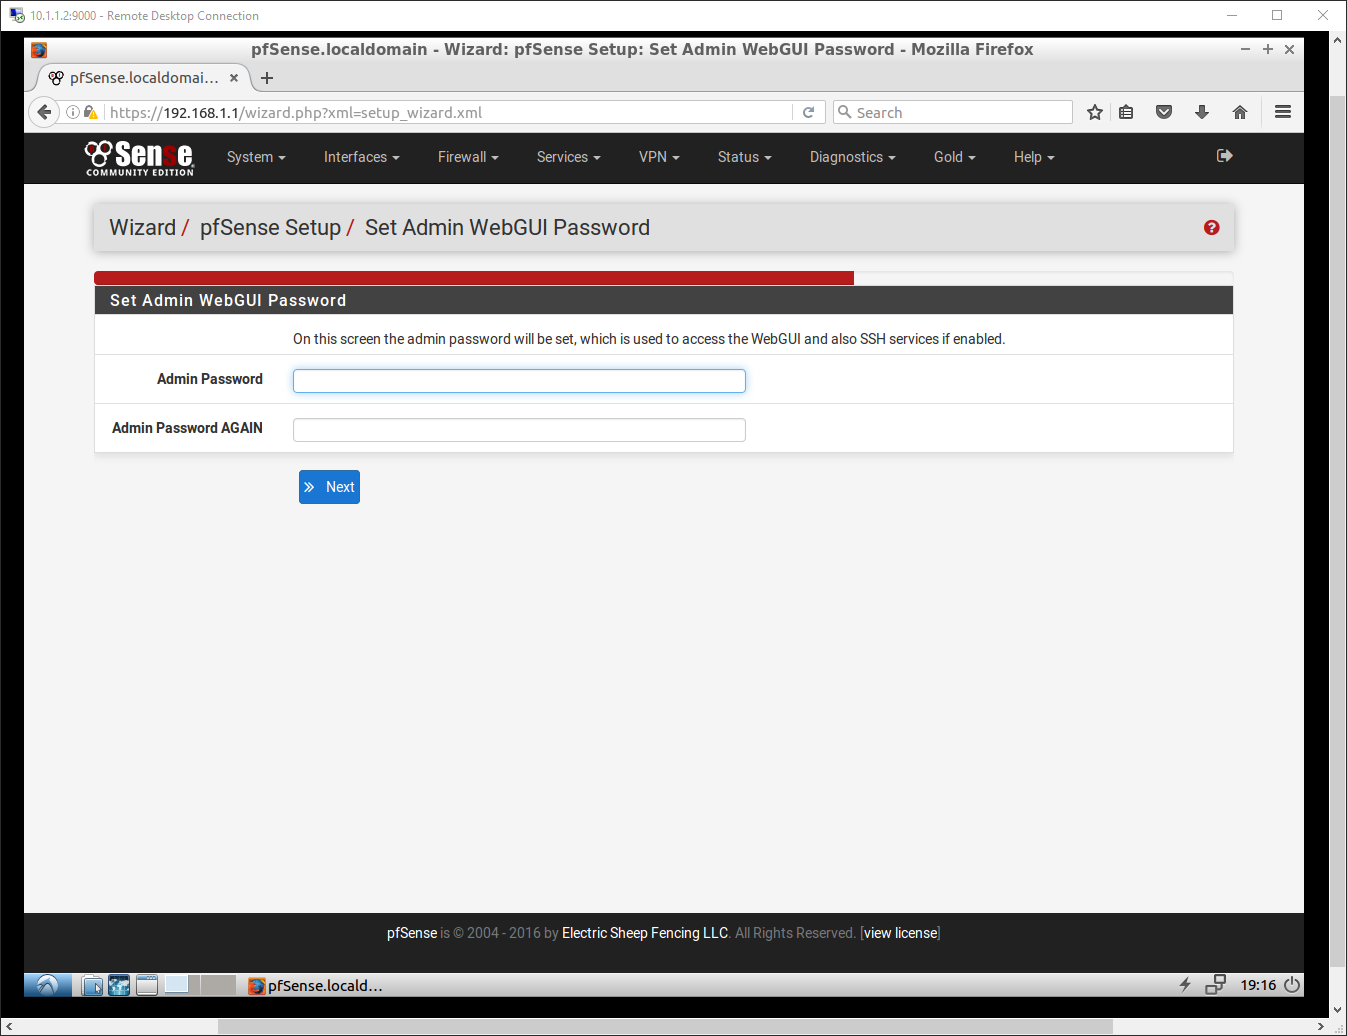
Upon choosing your new admin password, you’ll be prompted to reload with the new settings which will bring you to your dashboard (shown below).
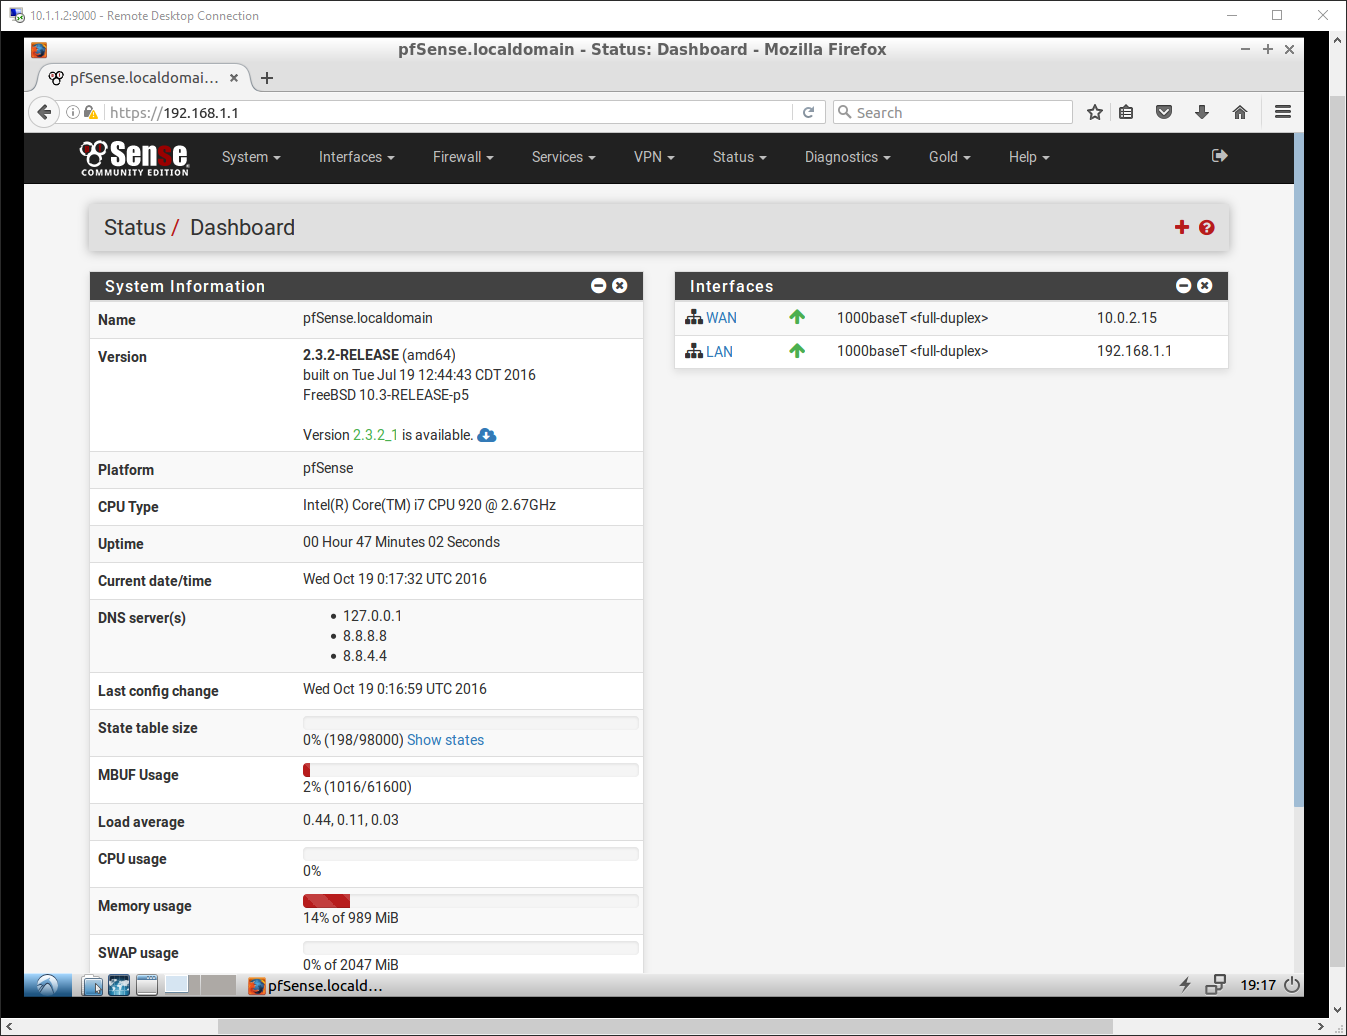
At this point, you’ve set up your PFSense virtual machine, and it is successfully issuing DHCP leases to the computers/clients on your network. All of this can be viewed/monitored by going to the “Status” tab, and by clicking on “DHCP Leases.”
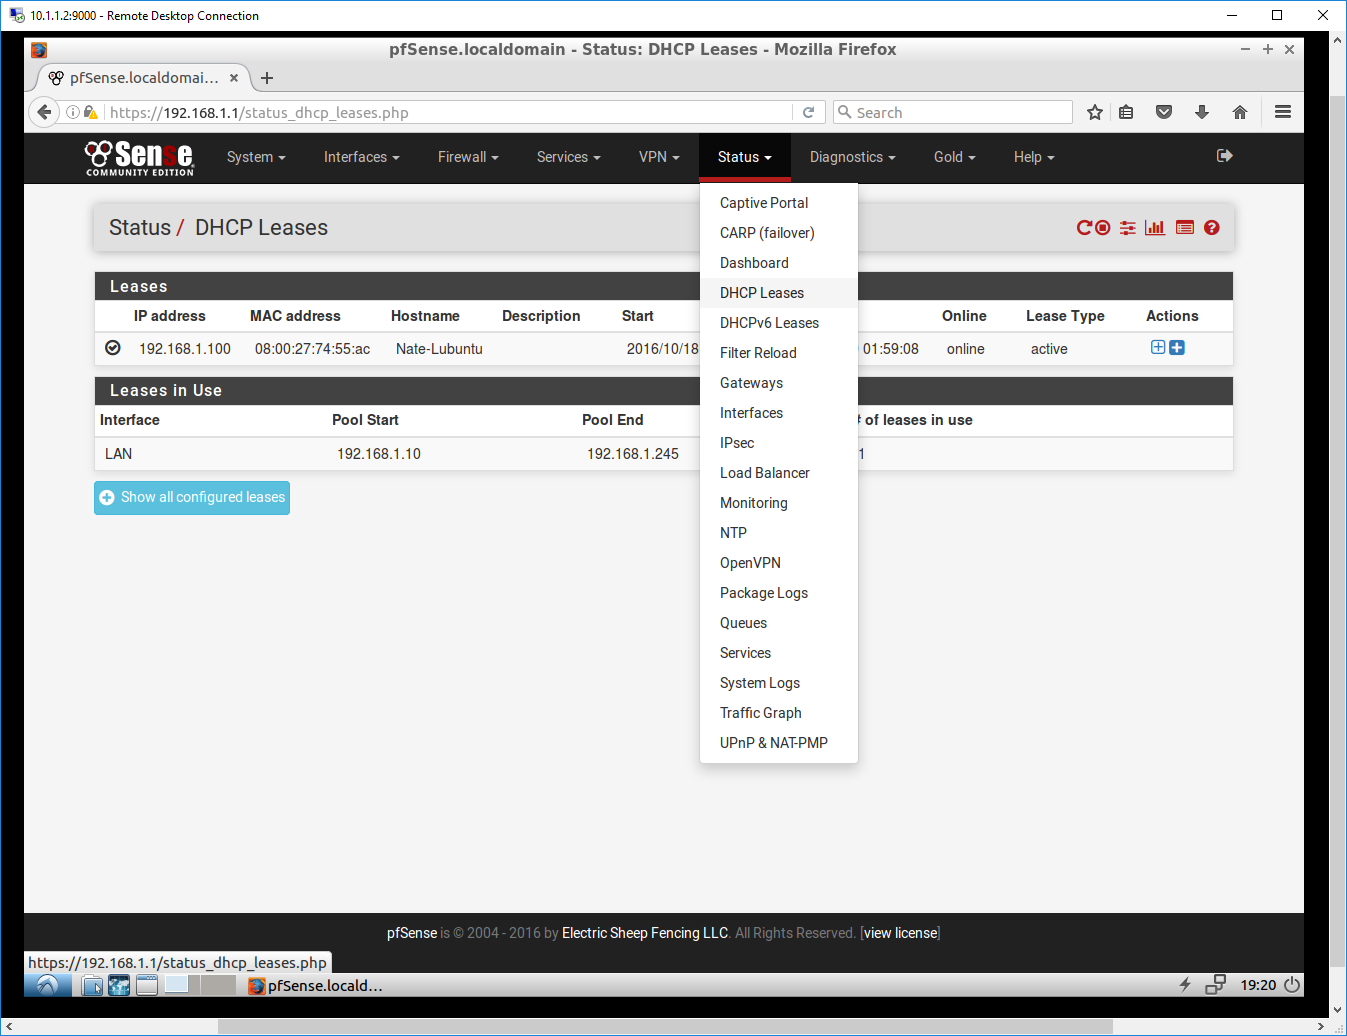
Congrats! You’ve setup your very own DHCP server using PFSense. From here, you can access endless options to customizing your DHCP leasing settings by going to the “Services” tab and clicking on “DHCP Server.”
The next guide I’ll make, will show how to enable the SQUID proxy to speed up your page loading time. The proxy uses local cache settings to increase the speed in which the websites you visit most load, and even speed up the windows updates that are downloaded on your network.